Backup, Backup, Backup!!!

No, I’m not a police officer, asking for backup.  But, you know what, for any of us who have important or critical data on our computers, it is almost as important.  The sad part is that sometimes as our technology gets familiar and seems trustworthy, it can reach out and grab us by the throat.

This virtually happened to me last fall when I had a computer and a hard drive die on me within a couple weeks.  Now, I didn’t loose anything of real value, because I did have a backup, but I hadn’t run it in a week or two.  So, I did lose a few things of minimal importance.  But, it got me thinking.  I tell my clients that I will keep their photos for years.  This is partially because we had some photos done of our family when our family was younger, but they disappeared during a recent move.  How that happened, I have no clue, but they aren’t to be found.  Now if the photographer had them in his archive, we could be saved from that disappointment.  So, this prompted me to go to significant measures to assure that all of my data is backed up.

Let me talk about the pitfalls of potential backup systems.

  1. Don’t rely on manual systems, it is always easier to forget and not do it
  2. Hard drives very seldom give users much if any warning that they are about to die. My hard drive failure gave me no warning.
  3. SSD drives fail as well, and they always give no warning
  4. One extra copy isn’t enough, if your data is critical

Basics of backup

  1. Your data isn’t really safe, unless you have three copies of the data
  2. One of these copies should be off site, if your office is destroyed by fire, tornado, hurricane, etc., can your business survive?
  3. If you do have a major disaster or a simple hard drive failure, how long can you afford to be out of commission while backups are restored?

Previous Computer Setup

I had a MacMini connected to a LaCie 6 TerraByte (dual 3 TB) hard drive connected through Thunderbolt 1 in a RAID 0 configuration.  I also had a 3TB USB3 connected hard drive as my backup.  Some of you may be thinking RAID hard drive therefore very secure.  Well, RAID 0 will lose all of your data when a drive fails.  However, I had become very addicted to the speed of RAID 0.  After a drive in the LaCie TB1 enclosure died, I replaced the drive and restored from my backup.  Some data was lost, but nothing very significant and it took me nearly 2 days to do this.  Well, I survived, but I realized that I was a bit lucky that it wasn’t worse.  So, I evaluated better backup options using the principles described above.

Backup Options

  1. Use my RAID 1 hard drive as my main data source and buy an extra USB 3 hard drive to backup my data for off site storage.  This could certainly work and meets the backup requirements, but I was finding the RAID 1 to be slower than I like for many of the operations that I do.
  2. Configure the Thunderbolt drive back to RAID 0 and run 2 backups.  It gave me the speed that I desire, but if one of those two RAID drives dies, I still have a couple days of reconfiguring the system again.
  3. There is also a RAID 4 or RAID 5 that requires at least 3 drives.  With this configuration, I can get the speed of the RAID 0, but if one drive dies, I can still use the RAID data.  You just simply replace the bad hard drive and the data rebuilds in the background.

My final solution

Click her for PDF Backup Diagram.

I didn’t expect to end up where I did, because it can be argued that it is overkill.  But, I sleep well every night when I think about my valuable business and personal data.  While researching RAID on the Mac, I discovered a really cool program called SoftRaid.  It allows you to configure RAID 0, 1, 4, 5, and 1+0 configurations.  It also allows you to setup a 3 or more disks in a RAID 1 mirror.  Software RAID is much more flexible than hardware based solutions and there is minimal overhead on the computer’s CPU.  RAID 5 has a little more overhead on the connection bus for similar data flows, and is capable of near SSD data flows, so I wanted to keep my main data on the Thunderbolt bus.  Hardware RAID solutions require replacement disks of equal specifications.  If the hardware fails, the disks probably would only work if put into an identical enclosure.

With SoftRaid, when a hard drive fails, you simply put in a new drive of equal or larger capacity and the software automatically rebuilds the RAID data.  This rebuild process happens in the background and you may continue to work on your data.  If an enclosure fails, I can simply move the drives to another enclosure and the RAID will continue to work.  Another advantage of SoftRAID, is that it can warn you when a drive is showing signs of crashing.  It isn’t 100% accurate in it’s predictions, but about 75% of the time it can predict a failure.

DSC06657
LaCie Thunderbolt 2 solution on the left and older Thunderbolt 1 solution on the right.  This provides me data throughput of up to 600MB/sec.

For backup software I decided on using software called Carbon Copy Cloner.  It is a wonderful piece of software that can be scheduled to wake up your computer, backup, and then shutdown the computer.  It also does other things, but it met my automated requirements.  Apple has a wonderful piece of software called Time Machine and I know many people who have been saved by it, including me.  I am not a huge fan of it, because of how Lightroom works.  There is a significant backup task that happens every hour that does slow my computer down and it can fill up the backup drive very quickly.

I ended up with a 4 drive RAID 5 configuration for my working data.  Around Christmas, LaCie had a great deal on 6TB dual drive TB2 hard drive that I couldn’t resist.

owc_mercuryalpro_single
3 single USB3 drives are mirrored in a RAID 0 configuration.  One drive is always off site.

My backup drive is actually a 3 drive mirror managed by SoftRaid.  Each of the drives is connected through a USB 3 interface.  One of the drives always lives at my off site backup location.  Periodically, every week or so, I disconnect one of the drives from the mirror, take it to the off site location, bring back the drive that was at the off site location and connect it to my computer.  SoftRaid automatically re-synchs this drive with the mirror backup in about 6 minutes.

With this system, I can handle up to 4 hard drives failing at about the same time without significant data loss.  One drive could fail in the RAID 5 array and 1 of the mirror drives at the same time, and my downtime would be limited to the time that it takes to replace the drives.  If 2 or more of the 4 RAID 5 drives fail at the same time, I would have to go through the 1 to 2 days process to rebuild from the backup.

There are many ways to manage your backup system.  But I would always recommend looking at the pitfalls of what you are doing and following the basics of backup which I outlined earlier in this blog.  Believe me, when you think something can’t happen to you, it does with computer data.


As a follow up from the last blog.  I thought I would get some pictures to illustrate different types of lighting.  I will be looking at indoor lighting because it is easiest to illustrate each of the points.

I want to thank my daughter in-law, Joy, for being a good sport and letting me take some ugly pictures of her.  I want to point out also, that she is fair skinned with freckles that are more noticeable, because she is getting lots of sun that is also drying out her skin.  But she is a wonderful young lady that my wife and I are pleased to have her in our family.

The first picture is a direct flash that is mounted on the camera.  This leaves a rather flat picture and an ugly shadow in the back ground.

On Camera Flash -8796

This next picture is a bare flash with no modifiers on it and at about 45° angle from the camera.  This picture looks considerably better.  Still a little flat, but better.  Significant shadows are seen under Joy’s chin and from her nose.  But, it does show the curves of her face better.  Joy’s hair over her left shoulder isn’t showing like I would like.  But the ugly background shadow is gone and her face has more dimension.

Off Camera Direct Flash-8799
Off camera direct flash

This picture is using a soft box about 26″ in diameter.  It is pretty close to her, maybe 3 feet or so.  A soft box located at a close distance will provide a more soft light.  This picture shows more curves on the face and the hair on her shoulder is very smooth and silky.

Off Camera Close Soft Box-8802
Off Camera Soft Box about 3′

The next shot has the soft box moved away about 3 more feet.  The height was about the same, so it came in and highlighted the eyes a bit more.  I also think the angle was a bit more straight on Joy’s face.  We have a better catch light in her eyes.  The shadow under her chin is smaller due to the shallower lighting angle.  But, the shadow line is a bit harder since the flash is further away and it is closer to a point source.  However, it is still much softer than the unmodified flash shots.  You will also notice that the background is also a little lighter now.  This is also a result of the flash being further from the subject.

Off Camera Far Soft Box-8804

This shot is now with the soft box directly above the camera.  It still renders very nicely, but you will notice that the nose shadow goes almost straight down and her chin shadow is more symmetrical as well.  The background has darkened some since the flash is now closer to Joy again.  This type of lighting can help remove skin imperfections, but in my opinion works best with a slim face and high cheek bones.

Off Camera Above Soft Box-8809

This shot was with the soft box pointed away from her.  This helped make the background darker.  If you look carefully, you can see that the catch light in Joy’s eyes is more like a cat’s eye.  A very vertical light.  This is because she was only seeing a small portion of the soft box.

Off Camera Edge Soft Box-8816

For all of the other shots, I had the curtains on a window to Joy’s left closed.  I then opened when I was done and used the light from the window as a fill light.  The light set up was like the third shot, except the soft box was a little lower which allowed better catch lights in the eyes.

_DSC8824

Of course there are an unlimited number of ways to light the scene.  Somebody might ask about bouncing a flash off the ceiling.  The ceiling can act as a giant soft box, but the angle is many times coming too straight down.  There are inexpensive flash modifiers that will reflect some of the light directly at the subject when the flash is pointed at ceiling which can help.  Also, bright windows can provide great soft light as well.

While we were in vacation, we came across an interesting situation, that a non-photographer probably wouldn’t even notice.

We were in Santa Cruz, California walking near the beach.  The first thing that I noticed when getting out of the car, a photographer with 2 soft boxes and a couple cameras heading toward the ocean.

Surfer2
Young Surfers in Santa Cruz, California

We then stopped to watch some surfers for a while.  Once we got past the surfers I noticed a photographer taking pictures of a dancer.  She was striking various poses that aren’t normally held in dance, but they make a good photograph.  This photographer was using natural light without flash.

Then as we moved on we watched another photographer that was getting a picture that to me looked like either an engagement picture or a set the date type of picture.  The hard part about this was that they had a small dog with them that they obviously wanted in the picture.  But, every time the photographer crouched to get the proper angle, the dog would go running to the photographer.  This photographer was using an on camera flash, but holding it away from the camera with his free arm.

surf Museum-08274
Young Surfers in Santa Cruz, California

I apologize for not getting pictures of these photographers, but at the time, it didn’t occur to me that this would turn into a blog post.

The question that many people might ask, which method is better?

Using the soft boxes creates as the name implies, a soft diffused light, with very gradual shadows.  This is the type of lighting that is usually used in a studio or indoors.  It is bulky and this photographer had several people with him carrying equipment.  They were on the beach for a considerable time, but we didn’t see them, so I assume they were below us hidden by the cliffs that we were standing on.  It is difficult or impossible to overpower the sun with soft boxes, so it makes perfect sense that they were taking pictures in the shade of the cliffs.  When we did see them come up from the beach, they started taking pictures in a shady area a ways from the beach.  The pictures that they took on the beach probably resulted in some very nice soft faces with a fairly contrasty background.  The pictures in the shady area probably allowed the photographer to make his subjects considerably better illuminated with a darker but blurred and non-distracting background.

The dancer pictures without flash most likely resulted in a nice environmental portrait showing cliffs, and/or breaking waves and the dancer.  Contrast in the bright, although evening, sun may have been more harsh than some would like.  But, for photographs of sport, gymnastics, and dance can effectively use this higher contrast.

The pictures of the couple and their dog where the photographer was holding a flash at arms length from the camera probably came out nice.  The extra flash probably softened the photo some.  But, if you want to have a picture of a couple walking on the beach, you really don’t have any other option (soft boxes just don’t work in full sun, until almost sunset).  Holding it arms length would have a more softening effect than mounting the flash on camera.

So which is better?  It depends upon what you want for an effect.  The photographer with the soft boxes should have been able to create some nice pictures in the shade of the trees near the beach.  The other two photographers probably created some nice pictures with beautiful ocean and cliffs in the background.  Adding the flash should have softened the couples pictures a bit, which would be a nice improvement.

Just like a good carpenter wants to have quality tools in his tool box, and the right tool for the right job.  So, the Pro wants to be in the same place, good equipment and the right lens  or lighting equipment for the situation.

Lenses
Lenses that Sony markets.  There would be more lenses for a similar shot of Nikon or Canon lenses.

For the most part full frame cameras are used by the professional.  These cameras in my opinion can produce images comparable and probably better than the medium format camera of 30 years ago.  Some of the high end fashion and magazine cover shooters may use a medium format digital today.  But the expense can be very high, up to $45,000 just for the camera.  The lenses aren’t inexpensive either.  It should also be pointed out that the pro may use any other cameras from the advanced amateur in some situations.  The APS-C and micro 4/3rds is adequate for work that won’t get past the web and shallow or razor thin depth of field isn’t needed.  Many are also considering the 1″ sensor cameras for their non-paid work, for their family or similar situations.  It is a small camera, so they don’t have to carry around huge amounts of gear and in most situations it can produce a good picture.

Another feature that I didn’t hit in the last blog, is that most of the amateur and pro photographers want to shoot in ‘RAW’.  The reason that we say, that we want to do it, is to be able to use the increased dynamic range of the photo (usually 14 bit vs 8 bit in jpg).  That is true, but it can also save us from errors that we as humans make.  Such as setting the wrong color balance, or underexposing, or over exposing.  The ability to change, contrast, color balance, brightness can turn an average photo into something special.

In the full frame camera world, there are 4 companies today.  Nikon and Canon have dominated in the past.  Sony has made significant gains that the last few years.  And, Pentax is just now re-entering this market.  I say re-entering because in the past, they made very popular cameras for the 35mm film market.  They made one attempt to make a full frame digital camera a few years ago, but it was a flop.  Their new full frame K-1 is getting very good reviews and for the Pentax faithful, it will provide a good place to land.  Pentax, it should be noted, has a couple entries in the medium format category as well, which are reasonably well priced in their sector.

Nikon D810
Nikon D810, Nikon’s best general purpose Pro camera. $2800 for the body

The full frame camera can run from about $1500 to $6000.  So what are the differences?  One of the differences, is that the pro would like a camera that is reasonably weather proof or resistant and is sturdily built so that it can with stand the occasional hard bump or drop.  But, there are also other differences and I will try to explain by breaking photographers into 3 categories, Portrait, Landscape, and Sports.

The portrait photographer is looking for color depth on the top of his list.  Ability to shoot photos quickly is good, but he usually has to wait for his studio strobes (lighting) to recharge a half second or 2 seconds.  So shooting 5 or 15 photos in a second isn’t too important.

The landscape photographer is looking for dynamic range.  In other words to be able to catch detail in the shadows and in bright sunlight.  Again shooting 5 frames a second doesn’t matter.  A high resolution camera will probably be at the top of the list as well.

Canon EOS 1Dx II
Canon EOS 1Dx II, top of the line DSLR, A favorite among sports photographers, $5,999 for the body

The sports photographer is looking to be able to shoot a many frames per second and to have an excellent focusing mechanism to follow the action.  He also wants a camera that he can push to a high ISO, so that he can use a fast shutter speed and stop motion, also to reduce camera motion blur.  Resolution usually isn’t as important to a sports photographer, because lots of pixels will slow his camera down.

I would like to cover two more topics quickly.

The first is a short discussion of how these cameras are viewed in the market place.

Canon and Nikon are the old standbys and have a large installed base and due to the investment that people have in their lens systems, it is difficult or at least a well thought out decision to move to a different manufacturer.  They both make excellent lenses.  Sony has been the ‘other’ guy for a while.  Sony of course makes their own sensors and they also make all the Nikon FX and DX sensors.  Canon has fallen behind some in the last few years in their sensor quality, showing more noise in shadow areas and not being able to pull as much detail out of underexposed areas.  In fact an independent rating organization (dxoMark.com) rates the sensors in cameras and Sony and Nikon cameras completely dominate the top 16 places of the full frame cameras, with Canon finally coming in at number 17.  Canon’s last two releases show some progress in this area, these cameras haven’t been rated by DXO yet, but they will probably crack the top 10, probably not past that.

Sony A7

Sony has taken a progressive approach and is making their cameras without a mirror.  All 4/3rds cameras and many APS-C camera are mirrorless.  These cameras are gaining strength in the market place.  Native Sony lens selection has been very limited until recently, but the design allows Canon, Sony A mount, Nikon and other lenses to be used by using an adapter.  People like the idea of not having a mirror that is causing vibrations and the view finder showing exactly what will be in the picture.  The EVF has improved enough in the last few years that many consider it better.  There is also some size savings that many consider an advantage.  Speed of focusing isn’t up to the level of the best DSLRs, but the last camera released by Sony in APS-C format has made the focusing debate a close call.  Better in some situations, not as good in others.

The second one is the concept of the ‘bridge’ camera.  Basically, a bridge camera is a long zoom fixed lens camera.  It will probably zoom out to 200mm and some cameras up 2,000mm effective focal length.  These exist in the 1/2.3″ format as well as the 1″ format.

Customers in this category will have a very broad range of choices and desires.  But, remember they are interested in controlling most every part of photography.  This includes Field Of View (FOV) and Depth of Field (DOF).

Cameras with 3 different sensor sizes fall into this discussion.  1″, 4/3″, and APS-C.  There are interchangeable lens cameras and fixed lens cameras available in all three categories.  I put the 1″ sensor in this category, because you can start to do a good job in controlling depth of field with this sensor and low light shooting starts to improve significantly.  But you will also see that costs start to escalate significantly in this category.

Nikon One
Nikon J5, 1″ sensor, 27-270mm f4.0 – 5.6 MILC

Nikon was the first company to attack this segment with their One series.  Just to put a line in the sand, the camera sell for about $900 today.  Lots of good features, but my problem with this camera is the f4.0 lens.  Since it is a smaller camera, I would have liked to see a f2.8 lens.  For an ILC, switching lenses and other hassles of this type of camera, there needs to be more reward.  Faster Prime lenses can be purchased.  Lenses run about $150 to $900 for this camera.

Recently Nikon added fixed lens cameras to their 1″ or CX line.  Actually these are called DL cameras for $650 to $900 depending on the lens attached.  These cameras begin with a f-stop of 1.8 and the longest zoom has wide angle f-stop of 2.8.  The Camera with the longest zoom 24-500mm has an f-stop range of 2.8 to 5.6.  The least expensive camera has a 24-85mm zoom and an f-stop range of 1.8 to 2.8 for $650.  The mid-range has a 18-50mm zoom and the same 1.8 to 2.8 f-stop range for $850 (wide angles are generally more expensive).

RX100-IV
Sony RX100-IV, 1″ BSI sensor, 24-70 zoom, f1.8-2.8

While Sony wasn’t the first to market with a 1″ sensor, they do make all the 1″ sensors for Nikon and of course for themselves.  But, Sony, is about the only camera maker that is seeing profits go up, and I think to a large degree it is because of cameras in this category.  Sony was the first to offer the 1″ sensor in a fixed lens camera.  They offer 7 different cameras in this segment.  Prices range from $500 to $1,500 for these cameras.  The $500 model, RX-100, doesn’t have the BSI, but it has a good 28-100mm lens which is very functional and a maximum f-stop of 1.8.  The most expensive (RX10-III) has the BSI sensor, 24-600mm lens, and a 2.4 to 4.0 f-stop range on the zoom.  Not to mention 4k video with 960 fps video at 4k for slow motion effects.  While these cameras are expensive, they are loaded with features that make them very capable.

These cameras will provide much better low light capability than cell phones and much better zoom performance than the 1/2.3″ sensors.  Plus, what they can do with video makes them very attractive.

Olympus OM-D E-M10 Mark II
Olympus OM-D E-M10 Mark II, MFT, 28-84 zoom, f3.5-5.6 about $600

Then there are the micro 4/3rds format.  This is a larger sensor, and I think all cameras made in this format are ILCs.  Panasonic and Olympus sell this format.  There is a large installed base and lots of lenses that can be purchased to custom fit your needs.  If a person wants an ILC system, this sensor size is the smallest that I would recommend.  Bodies without lenses start at about $400 and go up to about $1300.  Lenses cost about $150 to $2500, although the vast majority are $200 to $600.  But, it is a huge selection which is nice.

Sony Alpha a6000.png
Sony Alpha a6000, APS-C, 24-75mm, f 3.5- 5.6, about $600

The next sensor size is the APS-C.  About every major camera maker is in this category.  Although there is a divide between Mirrorless and DSLR.  I won’t touch that controversy today, but I do have my opinion.  But, ultimately they are capable of producing the same quality pictures.  Body only packages begin at around $300 and basic lens kit packages start at around $400.  A high end body will be around $1600. Lenses start at around $150 and go up to a little over $2000.  So due to the fact they are a little larger they are a bit more expensive than the 4/3rds lenses.  These camera lens combinations can provide excellent results in a variety of situations.  They will generally provide better low light capability than their 4/3rds brethren.

Remember I talked about some advantages to being small to level the playing field.  One of them is that the 1″ cameras are capable to doing faster frame bursts than the APS-C cameras.  They also might be able to provide better FPS in the video mode as well, which will result in better slow motion effects.  Basically, since the sensors are smaller and usually a few less pixels, they can read the data off the sensor faster, and move on to the next frame or picture quicker.

As you can see there is a big range with what you can do here and spend.  $500 can get you into a good system.  If, being small and taking very good pictures in a variety of situations, the 1″ sensor with a fixed lens is the way to go.  If you want more flexibility and don’t mind carrying around a little more weight, the MFT and APS-C are good choices.


I want to start out this blog on why today’s camera phones actually do a pretty good job.  If you go by the ‘size matters’ analogy, quality should be poor at best since a full frame camera is about 50 times larger.  The better cell phones have sensors that are just a little smaller than the green 1/2.5″ rectangle below at 1/3″.  I should point out that this diagram is not to scale.  Depending on your screen, maybe 3x larger than life.

Sensor_sizes_overlaid
Relative sensor sizes.


One of the smaller negative films, disc camera, had an image size of about the 2/3″ rectangle, but image quality was less than what a modern cell phone can do today.

To keep things a bit simpler, let me wave a hand and describe the factors that level the playing field between a large sensor and the smaller sensors.  Basically picture quality relates to a signal to noise ratio.  In general, a larger sensor will create more noise.  The relationship isn’t linear, but it levels the playing field some.  Also, another development in the last few years is BSI, back side illumination.  This has improved low light performance greatly in the cell phone world.

As we are talking about leveling the playing field, it should also be noted that the cost of making a fast lens for a small sensor is cheaper.  It is also easier to design a zoom lens with a smaller sensor.

Ok, so we have the basics down, right?  Let’s talk about the person who would like a camera with a better zoom, Type 1.

A point and shoot camera with a 1/2.3″ (6.17 x 4.55 mm) BSI sensor (just a little bigger than the 1/2.5″ sensor) and a 30x zoom can be bought for around $350.  In other words, it covers a 24-700mm full frame equivalent focal length.  It has a minimum f-stop of f3.5 to 6.4.  It will take good pictures in sunlight when zoomed in for your kids ball games… but it will struggle for an indoor shot at graduation or something like that.  Most of these cameras have a minimum f-stop around 3.5, so while the sensor is larger the f-stop doesn’t let in as much light… so shooting a group picture in a dimly lighted restaurant won’t be any better than your cell phone.  Your cell phone does well because it has an f-stop of about f2.2 or f2.4.

Canon Elph 190
Canon Elph 190 IS, f3.0 to 6.9, 10x zoom, about $150

Or a Canon with the same size BSI sensor and a 12x zoom (25-300mm) for about $200.  This camera has an f-stop of 3.6 to 7.0, so it has considerably less zoom, and on average it will probably perform less well in low-light situations compared to your cell phone.  But, the low light performance difference may not be noticeable by most people.  The picture above is of a another Canon that was released at the same time, 10x instead of 12x zoom, f-stop of 3.0 to 6.9, and not BSI sensor for $50 less.

These cameras are small enough to put in a large pocket or purse, so they are easy to take with you.  Pretty much every brand has a camera or two in this range.  But, due to the quality of the cell phones today, the market for these simple point and shoot cameras has decreased in the last few years.  But, if you are Type 1 and want some real zoom on your camera, this is the least expensive way of doing it.

Questions?  Please feel free to ask in the comments or e-mail me.

DCS620x
Kodak DCS 620x, Kodak electronics in a Nikon F5 body.  2MP for a mere $10,000 in the year 2000.

I am amazed at the changes in the photography world in the last 20 years.  Yes, cameras have become little computers that gather images to last forever.  I bought my first digital camera in June of 2000.  I wasn’t on the bleeding edge at this point, but I was on the leading edge.

In 2000, I will put photographers in 4 categories:

  1. Casual shooter, probably owned an instamatic or a smaller film size that had limited capabilities, but it was inexpensive to buy.
  2. Intermediate photographer.  They probably owned an inexpensive 35mm camera with a fixed or zoom lens that was easy to carry around and could provide nice pictures.
  3. Advanced Amateur or professional.  They owned an SLR camera that used 35mm film, but with a large lens selection and better lenses, they were able to create better pictures
  4. The Professional, They probably used a 35mm camera and also a medium format camera and maybe large 4×5 cameras.

One characteristic that was true then and is still true today, bigger is better (in most situations).  It makes sense, a bigger camera/lens/film/sensor will catch more light which makes it easier to capture a better detailed picture.  This is true today with digital cameras, but there are some factors that level the playing field some.

DSCS50
My first Digital Camera, Sony Cybershop DSC-S50.  2MP camera for MSRP $700

When I bought my first digital camera in 2000, the technology had advanced enough that a digital camera could be bought to satisfy the needs of all four categories.  Although they didn’t satisfy all the needs of the advanced amateur or Professional.  But most professionals saw that technology was changing and digital was the future, so they adapted and learned the technology along the way.  Ok, one of the best Professional cameras in the 2000, was a joint effort between Kodak and Nikon, that cost about $10,000 and had 2MPixels (MP).  It did take good pictures though.

Fast forward to today. A quality Professional full frame (35mm) will cost $2,000 to $6,000.  These Cameras will have anywhere from 25MP to 50MP.  Plus expensive lenses to go with it.  Times have changed.

Let’s look at our 4 photography categories.

  1. The Casual shooter is happy with their cell phone.  And, they should be, the modern cell phone can take better pictures than what the film cameras they were buying in 2000 were capable of doing.
  2. The intermediate photographer is using their cell phone, but they may be buying a digital camera that has a significant zoom.  Since their cell phone doesn’t really zoom.  But, they aren’t overly concerned with low light shooting and depth of field.
  3. The advanced amateur is concerned with low light shooting and depth of field control in their pictures.  They probably have an interchangeable lens camera (ILC)
  4. The Professional will of course have several cameras.  But their best camera will most likely be a Full Frame capable of shooting 20MP and up pictures.  They may also go up a step to a Medium Format digital camera (costing $8,000 to $45000).  Some still shoot film in the medium and large format categories.  Yes, some still shoot film in the 35mm format, but they are becoming a rare breed, and I don’t expect to see a revival as we are seeing with albums/records in the music world.
IMG_1266
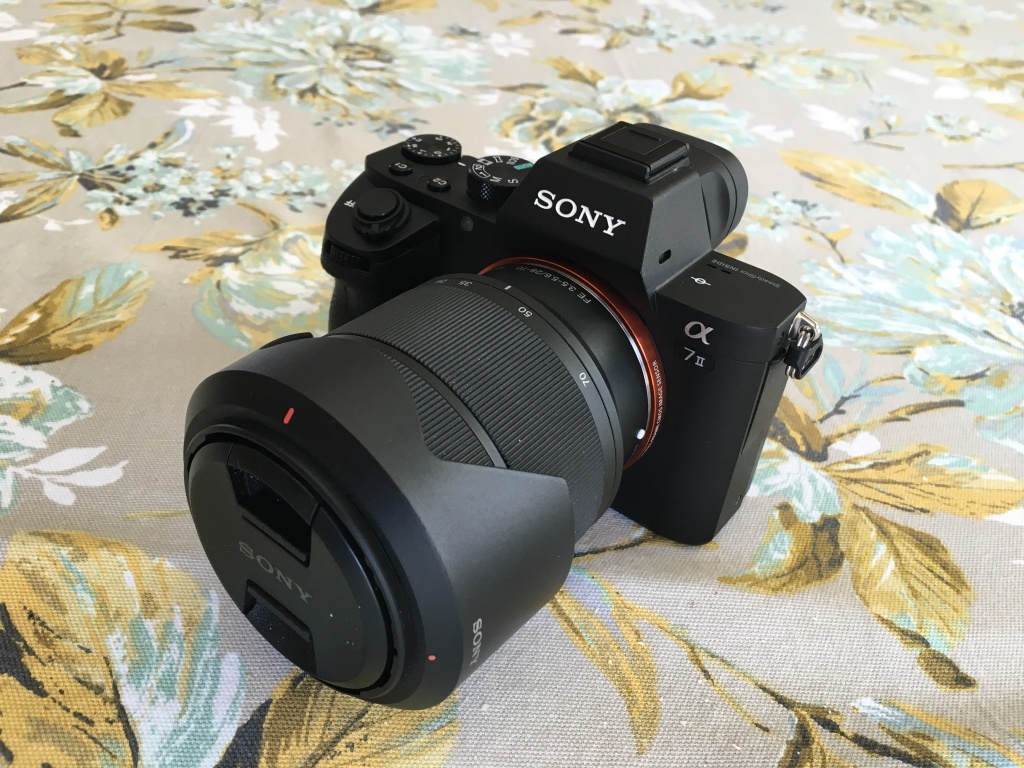
Sony A7 II, a Full Frame 25MP camera

In the next 3 blogs, I’ll look at what cameras make sense in categories 2, 3, and 4.