I ran across an interesting way to do interior photography that appeared to me to provide some great results and still be able to have control over the complete process with reasonable effort. I have a relative who does some amazing interior work. I became aware of how to do it, a few years ago, but it seemed to be just too much work for average properties that most of us think about buying. When I saw this method of doing interior work, it just clicked with me as a great way to provide value to realtors and have fun while doing it. If it isn’t fun, I am not doing it.
I will walk us through various levels of difficulty in producing interior photographs. The most simple is to simply take a picture and adjust the exposure for the interior. Fig 2 shows this result.

This photo will work, but the windows are distractingly bright. The rest of the photo doesn’t have much punch and seems a little flat. This room has an abundance of windows, so there aren’t a lot of problems with color casts. However, it just doesn’t leave a strong feeling that I want to sit in this room and enjoy myself.
The next way of changing the photo is to add flash. Flash has good points and bad points. The good is that if used properly it can remove color casts and we can bring the exposure close to the outside, so that the windows aren’t distracting. On the bad side, flash can make the picture even more flat. It can also add distracting shadows and feel unnatural.

In this example, the colors are a little cleaner. But, the big take away is that the windows are well exposed. However, the photo has the flatness of flash exposure and many of the shadows are unnatural, especially the ceiling fan shadow. I also did a small amount of work to reduce the exposure of the foreground in Lightroom. You might also note that the clock in the far corner has had the glare reduced so that it can be read.
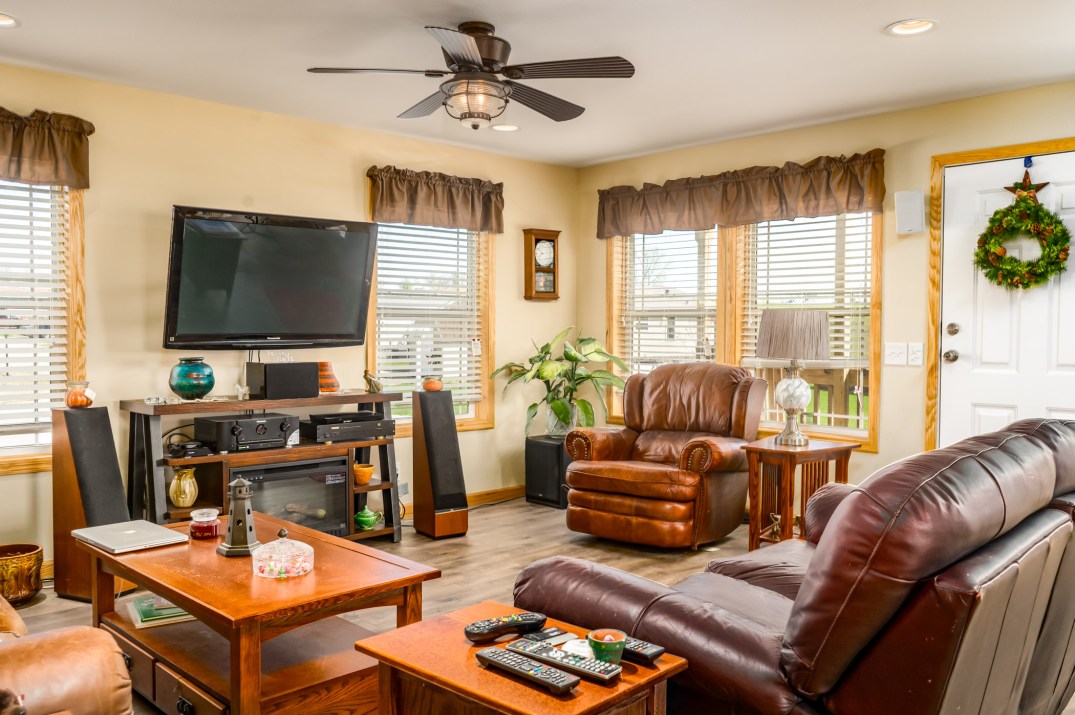
The next step is to merge these two photos together in photoshop to get the best part of each of these photos.
This photo has many of the best parts of each photo. We have reflections on the floor and furniture from the incoming window light. The reflections on the back of the love seat are from 4 other windows out of the frame. We also have shadows caused by the windows and over head lights. But, most of all, it appears to be a room that I want to sit in and have as my own. Yes, it could have been staged better, but it leaves a positive impression.
